How to Install Docker on Ubuntu 20.04 LTS

Docker is a combo of ‘platform as a service’ products and services which use OS virtualisation to provide software in packages called containers.
Containers contain everything an app, tool or service needs to run, including all libraries, dependencies, and configuration files. Containers are also isolated from each other (and the underlying host system), but can communicate through pre-defined channels.
This introduction to Docker video will give you a quick top-level overview of the tech and how it works:
Because Docker is open source software it’s not only free to use, but free to adapt, extend, hack, or build on. In this guide I cover installing Docker on Ubuntu 20.04 LTS (Focal Fossa), but the same steps may also work on older versions of Ubuntu, including Ubuntu 18.04 LTS.
In this post you will learn how to install Docker from the regular Ubuntu repository, how to enable Docker to start automatically at system boot, and how to install Docker images and run them locally.
But this isn’t a deep dive. This tutorial is intentionally short and to the point. This is so you spend less time reading and more time doing.
Install Docker from Ubuntu Repository
There are two hard requirements to install Docker on Ubuntu 20.04:
- You need to have
sudoaccess - You need to be connected to the internet
If you’re managing or setting up an Ubuntu server then you (probably) meet both of these requirements already, but do check before you begin.
Step 1: Install Docker on Ubuntu from the Ubuntu repository. Do this using the apt command and the docker.io package name (note: the package name is not simply ‘docker’):
sudo apt install docker.io
Ubuntu will download the latest version of Docker from its archives, unpack it, and install it on your system.
Step 2: Make Docker start automatically on system boot:
sudo systemctl enable --now docker
Step 3: Test it.
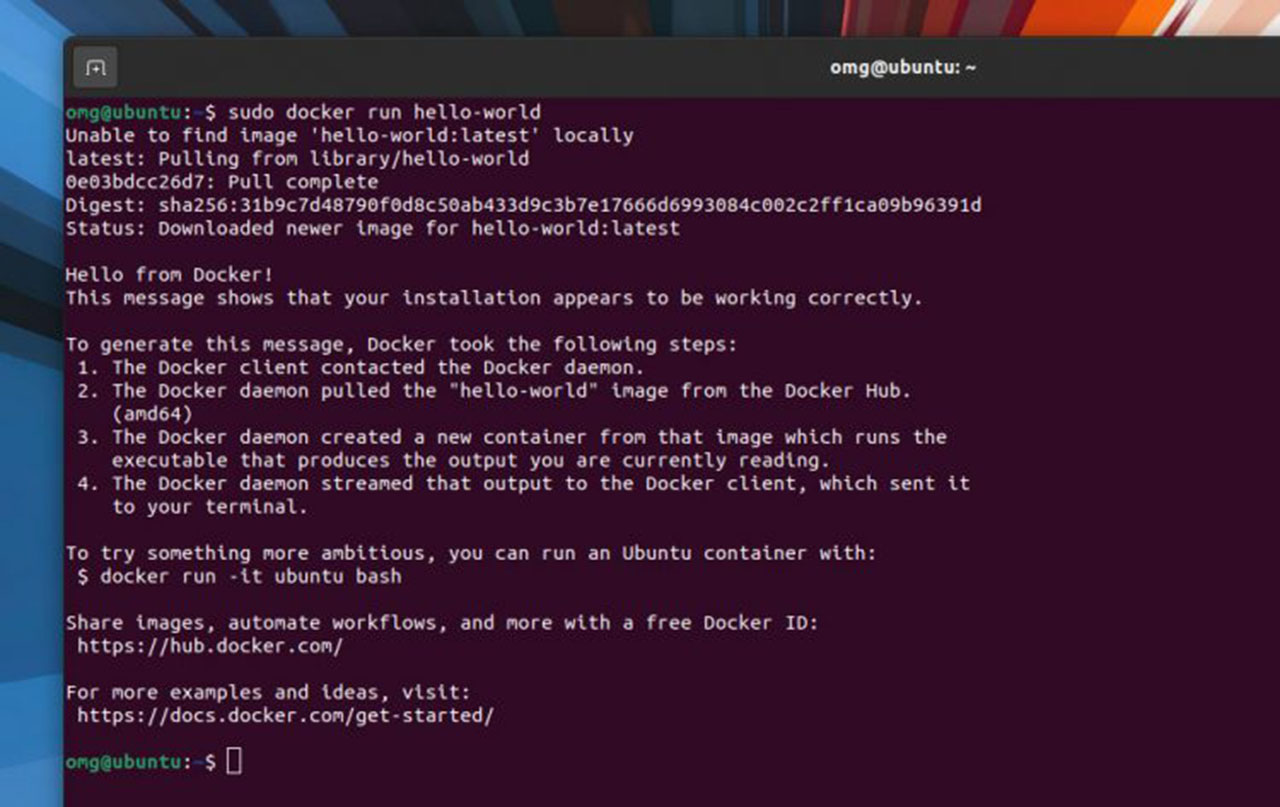
Now that Docker is installed and running you should verify that everything is working okay. This can be done using the hello-world app. From the command line run:
sudo docker run hello-world
When you run this command you’ll see a lengthy message informing you that the ‘installation appears to be working correctly’.
But look closely at the message:

You’ll notice something interesting near the start: Docker was ‘unable to find’ the a ‘hello-world’ image. But instead of quitting it searched for and downloaded it from Docker Hub.
Which leads us neatly on to…
Step 4: Find and install Docker images.
Now you’re set-up the world (or rather the Docker ecosystem) is your oyster, and Docker Hub your port of call. Docker Hub is billed as ‘the world’s largest library and community for container images’. Any image available on Docker Hub can be installed on your system too.
Let’s look at how to do that.
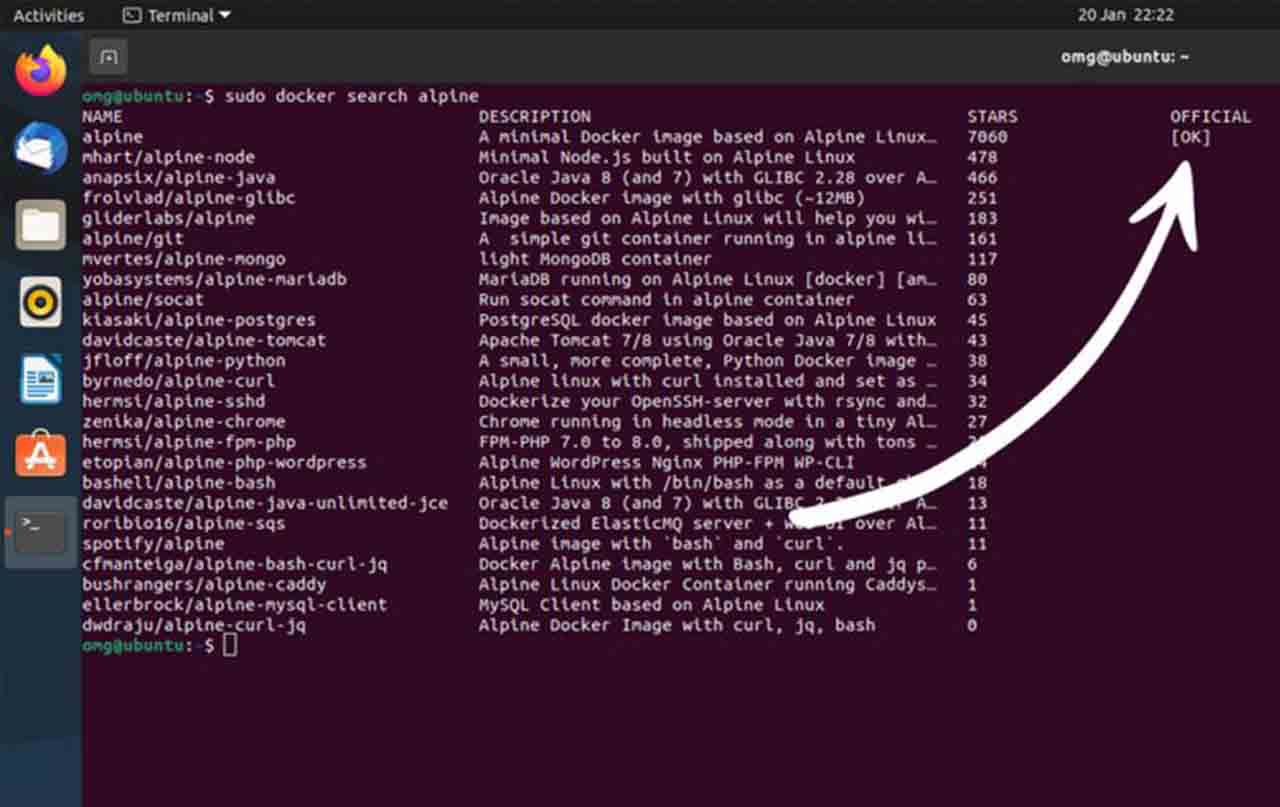
To search for an image on Docker Hub run the docker command with the search subcommand, like so:
sudo docker search term-goes-here
For example, I want to search for Alpine Linux on Docker Hub so I run docker search alpine. A list of matching images (which match the term alpine) will appear. I want the official Alpine image so I look in the OFFICIAL column for the word OK

When you find the image you want to use you can download it using the pull subcommand, For example, to install Alpine Linux I run sudo docker pull alpine.
To run a downloaded image you need to add the run subcommand and the name of the image, e.g., sudo docker run alpine.
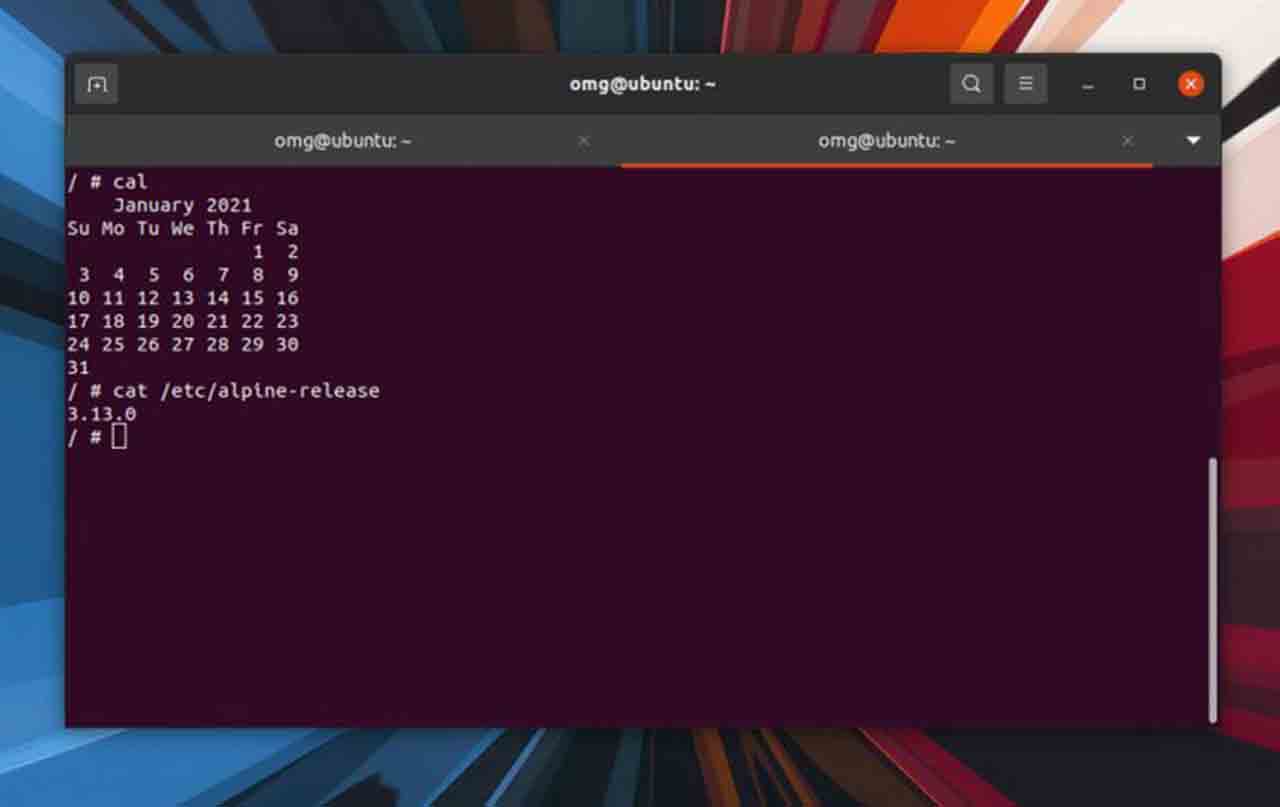
If you want to run an image as a container and get instant ‘interactive terminal’ shell access add the -it flag. For example: I run sudo docker run -it alpine and it drops me straight into the Alpine container, ready to work:

To exit the ‘interactive terminal’ type the word exit and hit enter.
Check out the Docker Docs page for a wealth more info on how to use, admin, manage, and maintain your containers.
A couple of useful commands to know include docker ps -a to list all images you’ve used (and see their container ID/name); docker stop {container id} to close an image down; and when you’re done with a container remove it using the docker rm command, again adding the the container ID/name at the end.
Going Further
In this guide we looked at installing Docker on Ubuntu 20.04 and getting official images installed. But this is only the beginning of what possible with Docker.
One possible avenue to explore is installing Docker rootless. This is an experimental feature and not (yet) easy to enable. But the effort required to set it up is worth it if you’re concerned about security and stability.
If there are topics you want to see a similar to-the-point tutorial on (be it Docker related or otherwise) do drop a note down in the comments or via my usual e-mail.


