
Configuring an Additional IP Address on a Linux Server
This document will take you through the process of adding an additional IP address to a Linux Server Network Configuration. The files you need to amend vary based on the distribution of Linux installed; however, all changes are executed at the command line that is accessed via SSH using the default IP address of your server.
To get SSH access, you will need your root password (displayed in the Control Panel) and an SSH client. We recommend Putty, which can be downloaded for free at:
How To Configure A Static Network IP Address On Linux
Consult the guide, Connecting to a Linux Server via SSH for instructions on how to download and configure Putty to launch the terminal window with the command line.
Follow the below steps once you have a terminal window open:
Configuring an IP Address for Ubuntu & Debian
- Open /etc/network/interfaces. An example of the file is below:
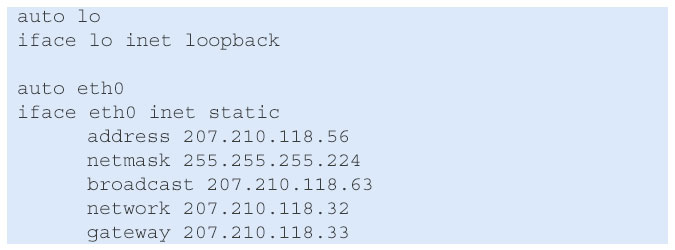
(Screen 1) - Below the line:
auto eth0
Add the following line:auto eth0:1 - Below the first interface description
iface eth0add the description of the second interface:iface eth0:1 inet static
address 207.210.118.58
netmask 255.255.255.224
broadcast 207.210.118.63
network 207.210.118.32
gateway 207.210.118.33
Make sure the mask and gateway are correct. These would be identical to the ones already specified. The only thing that changes is the IP address you want to add. The resulting file should look like this: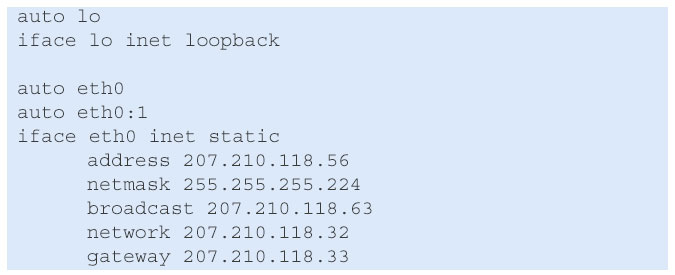
(Screen 2)
Configuring an IP Address for Centos
The process for Centos is slightly different in that you create a new interface file instead of amending and adding to the existing one.
- Go to the following directory on your server:
/etc/sysconfig/network-scripts
(Screen 3)
If you do an ls on this directory, you will see several files listed as illustrated below: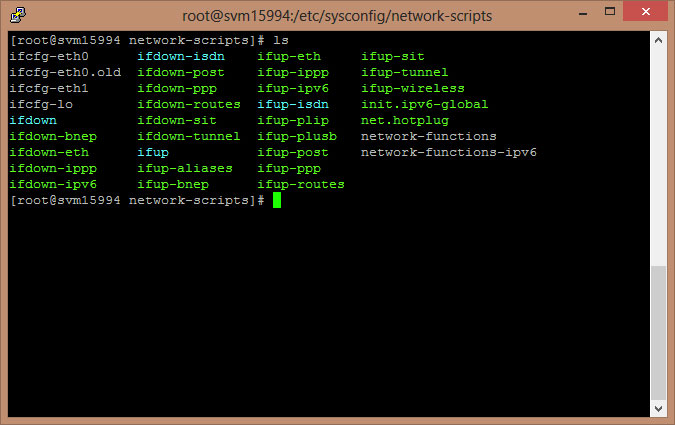
(Screen 4) - Verify which interface you will use to add IP addresses. Typically, this will be eth0 for public IP addresses. Type:
ifconfig
This will produce output similar to the following: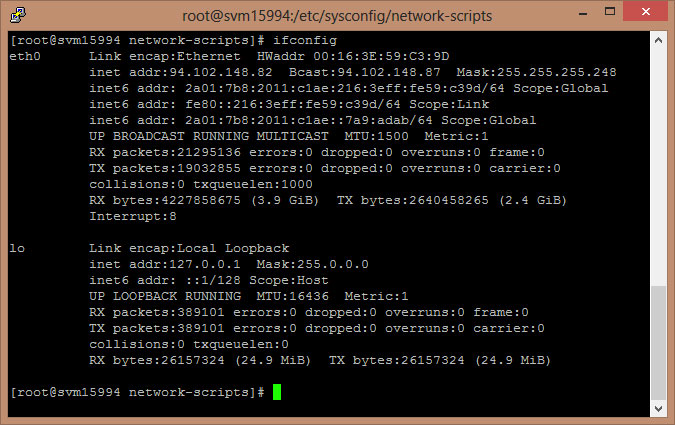
(Screen 5) - Make a copy of
ifcfg-eth0for each IP you wish to add and name themifcfg-eth0>:0,ifcfg-eth0:1, as shown below. Press 'Return' after each cp command: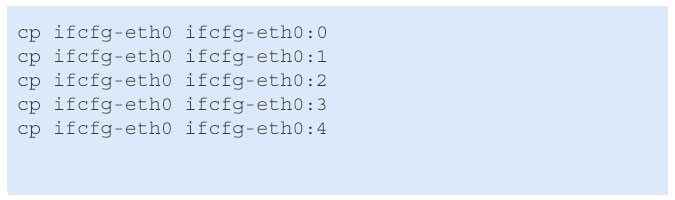
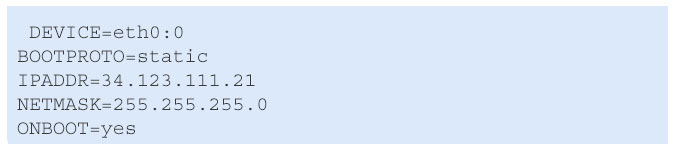
(Screen 6) - Open each command and change the DEVICE, IPADDR and NETMASK fields accordingly. A sample entry for each file would look like this:
(Screen 7) - Restart the network service:

(Screen 8)
Apply the changes made to the network configuration. Watch for any errors identified when restarting the service. - Use the following command again to verify the IP address assigned to your server:
ifconfig
Try to get SSH access to the server using the newly-added IP address to make sure it has been correctly added and is properly working. - To add a new IP address, open Netplan configuration file '/etc/netplan/50-cloud-init. yaml' in your preferred text editor, and add a new IP address in the IP address column as shown below: Once changes are made, save and close the file. Execute the following command to enable the new configuration.


